
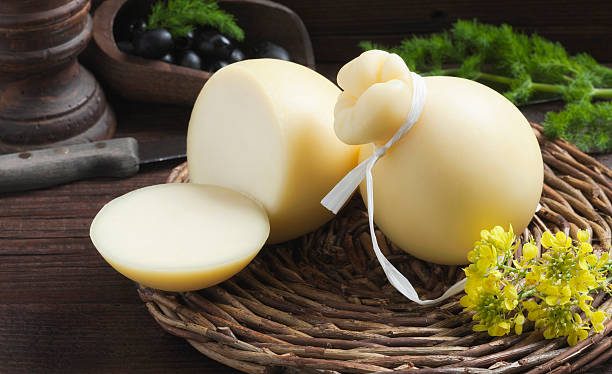
Provolone is an Italian cheese originating in Southern Italy. It is made from cow’s milk. This cheese is like mozzarella and is traditionally smoked. Provolone has a smooth, pliable and creamy interior. It has a light yellow color and it does not crumble when cut. It also has an agreeable flavor. The cheese comes in two types. One is the mild and delicate flavored dolce and the other is the longer-aged and sharper picante.
As a versatile cheese, provolone can be used in a variety of ways. It is commonly served as a table cheese and used in sandwiches, but it also makes a great cheese to use in baked pastas and casseroles, sprinkled in salads, and incorporated into desserts.
Here’s a recipe for making your very own provolone cheese.
Yield
Approximately 450g of provolone cheese
Aging Time
4 months +
Ingredients
3.7 L (1 gallon) pasteurized whole milk
¼ teaspoon Bioprox TPC thermophilic starter culture
⅛ teaspoon lipase powder dissolved in ⅛ cup cool water
¼ teaspoon liquid rennet dissolved in 1/4 teaspoon cool water
Cheese salt and cold water (for brining)
1.5 ml Calcium Chloride mixed in ¼ cup water
Equipment
Large pot
Good thermometer
Curd cutter/ curd knife
Slotted ladle
Large colander
Tray
pH meter
Heat resistant Rubber gloves
basin
Instructions
1. Pour the milk into the pot and heat to 36.11° C (97° F).
2. Sprinkle the thermophilic starter culture on the surface of the milk. Allow to rehydrate for 5 minutes. Mix well in up and down motions.
3. Cover the pot and allow the milk to ripen for 1 hour. Keep the temperature at 36.11° C (97° F) while the milk ripens.
4. Add the dissolved lipase mixture. Stir to mix well.
5. Let the milk rest for 10 minutes.
6. Add the diluted rennet and stir well in up and down strokes for 1 minute.
7. Cover the pot and let the milk set again for 20 minutes.
8. Check for a clean break by plunging a clean finger or a knife into the seemingly gelled milk and lift. Once you get a clean break, cut the curds into ⅜ inch cubes. Then let it rest for 10 minutes after cutting to heal.
9. Gradually bring up the temperature to 62.2° C (144° F) while continually stirring the curds.
10. Turn off the heat once you’ve reached the target temperature. Let the curds sit for 15 minutes.
11. Scoop the curds out of the whey. Place them in a clean colander lined with cheese cloth. Save the whey for later.
12. Give the curds a firm press to drain the excess whey and form a slab.
13. Let it drain for 20 minutes.
14. Suspend the colander on the pot of whey. Heat the whey. Keep the temperature of the curds to 40.5° C (105° F). Maintain the heat for 30 minutes.
15. Heat some water to 82° C (180° F). Take a small piece of curd and dip it into the heated water. Pull it a bit to see if it stretches. If it does not, put it back in the colander to heat some more. Try this step every 15 minutes until the curd stretches smooth and shiny.
16. Place the curd slab into a tray and cut it into 1 inch cubes.
17. Place the curd cubes into the pot with hot water. Let it sit for 30 minutes or until all of them stretch easily. Check also for the curds’ pH. It should be around 5.0 to 5.3.
18. Using your hands, form the curds into a large ball, then stretch into a jug shape with one end smaller than the rest. Make a small indention at the top of the jug. If the curd gets hard to work with, dip it back into the hot water.
19. When you are done shaping the cheese, place it in a bowl of ice water.
20. Make the brine. Add 900g (2 lbs) of salt in 3.7 L (1 gallon) of water. Mix well and chill.
21. Take the cheese out of the ice water and soak it in the brine for 2 hours.
22. Take out the cheese and pat dry with paper towels. You can put it on a mat or tie a cord around the small end of the cheese and hang it. Allow the cheese to ripen at a temperature of 16° C (62° F) for 2 to 12 months at 80% humidity. Turn the cheese daily. Wipe off any mold that may appear with salt solution or vinegar solution. You can also wipe some olive oil on its surface once a month to prevent mold growth and prevent the cheese from drying out.
Cheese Kettle also supplies cheese making and dairy processing equipment like milk pasteurizers, milk taxi and cheese vats.