For cheese lovers, few things are as rewarding as making your own creamy Havarti cheese from scratch. This Danish cheese, made in Denmark since the 1800s, is known for its semi soft cheese texture and mild, buttery taste. If you’ve ever found supermarket cheese lacking in character or wanted to control every ingredient, crafting Havarti at home is the perfect solution. This guide walks you through the cheesemaking process, from selecting the right equipment to ageing your cheese to perfection, so you can enjoy an authentic Danish treat right from your kitchen.
Why Homemade Havarti Is Worth the Effort
Many home cooks are intimidated by the idea of making cheese, but Havarti’s approachable process and versatile flavour profile make it an excellent starting point. Store-bought cheeses often contain preservatives or lack the nuanced taste of a freshly aged wheel. By making Havarti yourself, you can ensure the quality of ingredients, tailor the taste to your preference, and experience the satisfaction of creating something truly special. Havarti is typically aged for several months, which develops its smooth texture and characteristic flavour.
Essential Ingredients and Equipment for Havarti Success
Before you start, it’s important to gather the right ingredients and equipment. Using quality tools, like those from Cheese Kettle, ensures consistent results and a smoother cheesemaking experience.
Ingredients
- 10 L full cream milk
- 1/8 tsp Bioprox M265 Mesophilic Culture
- ½ tsp Calcium Chloride (diluted in ¼ cup non-chlorinated water)
- ½ tsp liquid rennet
- Cheese salt
- Cheese wax (optional)
Equipment
- Large pot (preferably food-grade stainless steel)
- Thermometer
- Curd knife and curd cutter
- Ladle or spoon for stirring
- Colander
- Cheesecloth
- Cheese hoop
- Cheese press
- Ripening container with a draining mat
Cheese Kettle offers cheese vat, curd cutter, and cheese press suitable for making semi soft and semi hard cheeses like havarti. These tools help maintain even temperature and consistent curd formation, which are important for achieving the desired creamy body and springy texture.
Step-By-Step Instructions: Crafting Havarti Cheese
Preparation and Milk Heating
Start by sanitising all your equipment—this step is crucial for a safe and successful batch. Pour the milk into your pot and gently heat it to 32°C. You can do this directly on the stove over low heat or by using a water bath for more even temperature control.
Culturing and Coagulation
Turn off the heat, sprinkle the mesophilic culture over the milk’s surface, and let it rehydrate for 5 minutes. Stir gently in an up-and-down motion for one minute, then cover and allow the milk to ripen at 21°C for 45 minutes.
Reheat the milk to 30°C. Once the target temperature is reached, add the rennet and stir gently for another minute. Cover the pot and let the milk set for 50 minutes, until the curds are firm and a clean break is achieved.
Cutting and Cooking the Curds
Cut the curds into ½-inch cubes using your curd cutter and knife. Maintain the temperature at 30°C and stir the curds gently for 10 minutes. Let them rest for 5 minutes while you heat water to 77°C.
Remove one-third of the whey and replace it with the same amount of hot water, added slowly to avoid overheating (keep the temperature below 38°C). If needed, adjust with cold water.
Add cheese salt and stir for 30 minutes, maintaining 38°C. Let the curds rest for 10 minutes so they consolidate into a mass.
Moulding and Pressing
Line a colander with cheesecloth and drain the curds, breaking up any large pieces to remove more whey. Transfer the curds to a cheesecloth-lined hoop, fold the cloth over the top, and press at 5 kg for 20 minutes. Turn the cheese, redress, and press again at 13 kg for 8 hours. The pressing process helps set the texture and determines the final weight of your Havarti cheese.
Ripening and Ageing
Remove the cheese from the mould and place it in a ripening container at 12°C and 90% humidity for 4 weeks. Turn the cheese daily in the first week, then twice weekly for the next three weeks. If mold appears, wipe it off with a brine solution.
After four weeks, wax or vacuum seal the cheese and age it for an additional 2 weeks to 3 months, depending on your flavour preference. This ageing process is what gives Havarti its smooth and creamy texture.
Serving and Enjoying Your Homemade Havarti
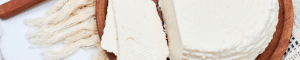
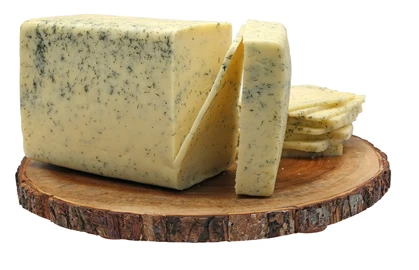
Havarti’s creamy, buttery, and slightly tangy flavour makes it a star on any cheese board. It pairs well with herbs and spices such as dill, caraway, and even red pepper. You can slice Havarti for a sandwich, cube it for a cheese board, or melt it for hot dishes. For variety, try substituting Havarti with Cheddar or Monterey Jack in your favourite recipes. Creamy Havarti is also similar in texture to Castello Havarti, which is sold in many stores.
Conclusion: Bring Artisan Cheese Into Your Kitchen
Making Havarti at home is more approachable than you might think, and the results are well worth the effort. With the right equipment and a bit of patience, you’ll enjoy a cheese that’s fresher and more flavourful than anything you can buy. This original recipe is unique to Denmark, with roots in towns like Copenhagen, and continues to be enjoyed worldwide.
Ready to Start Your Cheesemaking Journey?
Cheese Kettle offers equipment and supplies for making most cheeses, including semi soft and semi hard varieties like havarti. Explore our selection of cheese vats, curd cutters, and cheese presses to begin your own cheesemaking at home.