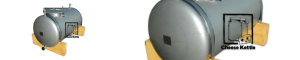

Raw milk should enter a milk tank that provides rapid cooling to the temperature set in your food safety program and holds it there until cheesemaking starts. The chiller and cooling systems must suit your milk volume, starting temperature and filling pattern. Your cleaning setup matters just as much as milk cooling. Milk residue left in the tank, outlet or fittings creates a hygiene and contamination risk before the next batch arrives.
Milk Tank Cooling Must Meet Your Food Safety Program
The milk tank cooling target must come from your documented food safety program and the cheese process that follows. Australian dairy industry rules under Standard 4.2.4 for dairy products require cooling and milk storage controls that prevent or reduce harmful bacteria growth. Before choosing a tank for your dairy operations, define the full cooling job. Include incoming milk temperature, largest milking volume, fill time, required storage temperature and the time before cheesemaking starts.
Also account for warm milk entering milk already stored cold. Milk intended for raw milk cheese has tighter requirements and must reach no more than 6°C within two hours. It must then stay at 5°C or below in storage unless an approved alternative applies.

Chiller Size Must Match The Incoming Milk And Fill Pattern
The chiller size must match the heat that needs to leave the incoming milk within your required time. Tank capacity alone does not tell you how much chilling power you need from milk cooling tanks.
Operating Detail | Why It Matters |
|---|---|
Incoming milk temperature | Warmer milk needs more cooling |
Milk volume per milking | More milk takes more chilling work |
Fill time | A slow fill spreads the cooling work over longer |
Target temperature | A lower target requires more cooling |
Existing cold milk in the tank | New warm milk raises the mixed temperature |
Room temperature | Hot air in the milk room adds heat around the tank |
Cheesemaking start time | Shorter storage gives less recovery time after slow cooling |
Use your warmest expected milk and largest normal batch when setting the cooling duty. Ask for cooling performance at those conditions, with starting temperature, volume, target temperature and cooling time stated together. Include your second milking if the tank stores more than one milking. The refrigeration system must return the mixed batch to target within your documented milk cooling process.
Milk Tank Capacity Must Suit Your Real Batch Volumes
The milk tank capacity must suit your usual and largest milk volumes while keeping cooling and temperature checks workable. An oversized tank only helps when its cooling surfaces and controls still work at smaller fills. At your smallest routine fill, the temperature sensing point must remain covered and the cooling system must still work at that milk depth. At your largest fill, the tank needs enough room for safe mixing and complete transfer through the outlet. Capacity also needs to match your cheesemaking schedule, milk yield and the number of milkings stored before processing. On a dairy farm, herd size and seasonal changes can alter the milk volume needing cooling.
Milk Tank Insulation Must Limit Heat Gain During Storage
Milk tank insulation should limit heat entering stored milk while it waits for cheesemaking. An insulated tank reduces how frequently the refrigeration system needs to pull the batch back to its holding temperature. Check which parts of stainless steel tanks are insulated and where cold surfaces remain exposed. Pay attention to the tank wall, base, lid area and components around the outlet. The chiller still needs enough capacity to recover from warm milk additions and normal heat entering during storage. Insulation supports cooling performance but does not replace adequate refrigeration capacity.

Milk Tank Temperature Checks Must Represent The Whole Batch
The milk tank temperature reading must represent the milk you are storing, not a warm pocket or cold area beside the cooling surface. The sensing point needs to stay in milk at every routine fill volume. Record the incoming temperature and the time filling finishes, then monitor the displayed temperature during cooling. Confirm the batch reaches its target within the time stated in your food safety program. If an agitator is fitted, use it according to your process before taking a representative temperature or sample. Keep the display easy to read and confirm it periodically with a separate checked thermometer.
Milk Tank Controls Must Make Cooling Problems Visible
The milk tank controls should make a cooling problem visible before milk sits warm for longer than your food safety program allows. You need clear temperature monitoring and a simple indication that cooling is running. The control setup should show the actual milk temperature clearly and protect the set temperature from accidental changes. An alarm or stored temperature record is useful when your approved process requires those checks. Test the controls during commissioning with milk at a normal working volume. Confirm what the display shows when cooling starts, reaches target and stops.
Milk Tank Cooling Must Be Proven At Full Working Volume
The milk tank cooling setup must be checked with the largest routine milk volume before you rely on it for production. Use the warmest normal incoming milk temperature and the fill pattern expected during milking. Run a practical cooling performance check:
Start with the tank clean, sanitised and ready for milk.
Record the incoming milk temperature and start time.
Fill the tank using your normal milking pattern.
Record the final volume and the time filling finishes.
Check the tank temperature at the times set in your procedure.
Confirm the whole batch reaches the required target on time.
Repeat the check when milk volume, filling pattern or chilling equipment changes. A small test fill does not prove the cooling system will handle your full routine batch. Include the normal second milking when you store more than one milking. This shows how the system handles warm milk entering an existing cold batch.

Milk Tank Cleaning Must Reach Every Milk Contact Surface
The milk tank cleaning setup must reach every surface touched by milk, including the stainless steel tank wall, outlet, valve and internal fittings. Wash liquid must reach these surfaces and drain away fully afterwards. The cleaning path should cover the inner wall, lid area, outlet, valve and any agitator shaft or internal fitting. Parts that still need hand cleaning should be easy to remove and inspect.
Australian food safety rules separate cleaning from sanitising. Cleaning removes milk residue first, and sanitising follows after the surface is clean to control contamination. After a heavily soiled batch, check the pre-rinse removes visible residue before the main wash. Keep detergent strength, temperature and cycle settings within your documented cleaning procedure.
Milk Tank Cleaning Design Must Suit Daily Cheesemaking
The milk tank cleaning design must fit the time available between emptying the tank and receiving the next milk. A slow clean can delay the next fill and reduce inspection time.
Cleaning Need | What To Check |
|---|---|
Water supply | Enough water is available for the full cycle |
Hot water | The required wash temperature is available |
Detergent | The stainless steel and other tank materials suit the chemical used |
Drainage | Wash water leaves without pooling around the tank |
Access | You can inspect and service the outlet and fittings |
Cycle control | The sequence is repeatable between batches |
Built-in cleaning supports easy cleaning where tank surfaces are difficult to reach by hand. Keep the cleaning procedure specific to the tank and detergent you use. Changes to detergent strength, temperature or cycle time should follow the chemical supplier and your dairy food safety program.
Milk Tank Placement Must Support Chilling and Cleaning
The milk tank position must support both refrigeration and cleaning before you connect milk lines. Leave enough room for the chiller, equipment service access, drainage and safe inspection of the tank. The floor must support the filled tank and allow cleaning water to drain without pooling. Keep the outlet, temperature display and service components accessible from the normal working area.
Milk hoses should reach the tank without long low sections that trap milk. Chiller air or cooling connections also need enough clear space for normal operation and servicing. A workable dairy plant layout shortens the path between milking, milk storage and cheese processing. It also makes routine cleaning and monitoring easier during production.
Our Cheese Kettle Milk Cooling Tank w/ Chiller and CIP System for Controlled Raw Milk Storage
We build the Cheese Kettle Milk Cooling Tank w/ Chiller and CIP System to order for milk cooling and storage before cheesemaking. Its stainless steel construction supports cleaning, its chiller is sized for incoming milk and target temperature, and the integrated clean-in-place (CIP) system handles routine cleaning without full dismantling. Contact us to order a Milk Cooling Tank w/ Chiller and CIP System sized around your milk volume, cooling target and cleaning routine.

Milk Tanks for Raw Milk Cooling
The remaining milk tank questions usually concern mixed milkings and time before cheesemaking. Both answers depend on the cooling controls in your approved dairy food safety program.
Milk Tank | Can I Add Warm Milk to Milk Already Chilled?
You can only add warm milk to chilled milk when your documented process keeps the combined batch within its required cooling limits. Check the mixed temperature and the time needed to return the whole batch to target. Size the chiller for this repeated warm addition when it is part of normal production. A cooling system tested only for cold holding has not proved it can handle that duty.
Raw Milk | How Long Can Milk Stay In The Tank Before Cheesemaking?
The allowed holding time depends on your approved process and the cheese you are making. For raw milk cheese, processing must start within 24 hours of milking unless an approved documented alternative applies. For milk that will be pasteurised before cheesemaking, use the storage limit in your dairy food safety program. Record temperature and holding time so you can confirm milk quality stayed within that process.