

Configuring a flexible farmers cheese workstation as one straight, logical line becomes even more powerful when you think like a cheesemaker standing at the vat, watching milk heat and curds form. Using good quality whole milk or raw milk, rather than ultra pasteurized milk, makes it easier to achieve the gentle set and silky texture you want for fresh cheese such as cottage cheese, ricotta cheese, and homemade farmer’s cheese.
The goal is a smooth path from milk reception to final pressing that works in real life, not just on paper. In practice, that means designing around how you stir, mix, heat, drain, and squeeze curd, and how quickly staff can move from bowl to press without rushing or waiting. You will still follow the same steady sequence you would use for a farmer’s cheese recipe at home warm, stirring occasionally, add vinegar or lemon juice, wait, then drain through cheese cloth but scaled up and supported by your 400 Ltr Stainless Steel Milk Tank, Cheese Harp, Cheese Making Press (Custom Sizes), and Commercial Mechanical Gravity Cheese Press.
Importance Of a Single Line Farmers Cheese Workstation
A single line workstation is like scaling up a good recipe you might make in one large bowl at home, where every step happens in order. You start with milk, gently heat it until small bubbles appear around the edge of the pot, then slowly pour in distilled white vinegar or lemon juice and stir with a wooden spoon. In the make room, that same logic applies each physical station should follow the next so your curds never sit too long and your freshly made cheese keeps its fresh character.
When milk tank, vat, cutting station, and presses sit in sequence, staff can cook, drain, and press with fewer stops and fewer trips across the room. That cuts down on waiting, confusion, and the risk that the curd becomes bit bland or over acidified while someone is looking for a free press. The result is a line that supports a consistent crumbly cheese style when you want it, or a creamier texture when you adjust times and pressures.

Mapping The Farmers Cheese Process from Intake to Pressing
To configure your line, first map the steps you already use when you make a test batch of homemade farmer’s cheese. On a small scale, you might warm a half gallon of cow’s milk on medium low heat, add a half cup of vinegar or the juice of a lemon, then wait less than an hour while the curds separate from the liquid whey. You then drain through cheese cloth, add salt, and maybe a little olive oil, black pepper, or red pepper flakes for extra flavor.
On a larger farm or commercial floor, the same milestones apply, just with more structure. You receive good quality milk into the 400 Ltr Stainless Steel Milk Tank, transfer it to the vat for heating and culture, cut it with the Cheese Harp, drain and squeeze it, then move it into moulds under your presses. Writing each of these steps in order will show you where to place equipment so that product always moves forward along your farmers cheese line.
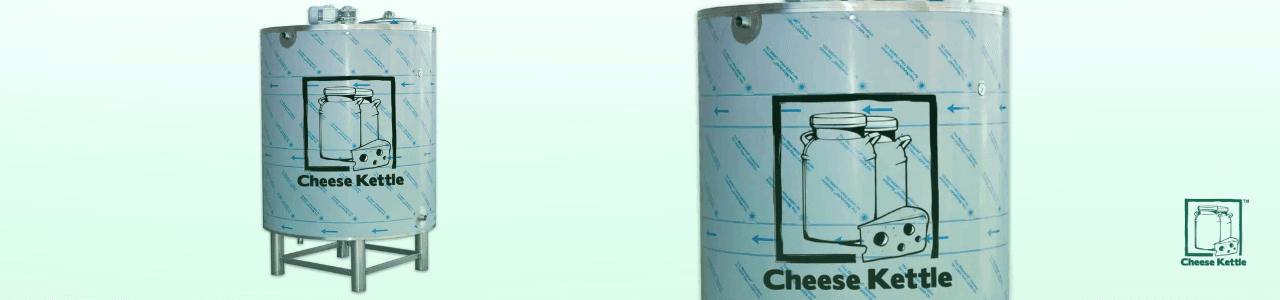
Role of The 400 Ltr Stainless Steel Milk Tank
The 400 Ltr Stainless Steel Milk Tank works like a scaled up bowl for your line, giving you a calm place to hold milk before it enters the vat. This buffer lets you collect raw milk or chilled whole milk without rushing, so you can check the expiration date, temperature, and taste before starting a batch. It also helps you avoid relying on ultra pasteurized or ultra pasteurized milk, which can be harder to set for traditional cheese recipes.
Because the tank can keep the milk cool and stable, you can time your heating and setting more precisely. That makes it easier to maintain a mild, sweet profile in your fresh cheese and to plan makes where curd will be pressed and moved to the refrigerator or fridge on schedule. In practice, the tank becomes the clear starting point of your line, where every batch begins its journey toward freshly made cheese.
Sequencing Tank, Vat, Cutting Station, and Presses
Once you fix the milk tank as your first point, position your vat so milk can move straight into it with minimal bends or lifting. Think of this transition like moving your home pot from stovetop to bench the shorter the move, the less chance of spills, cooling, or mistakes. Next in line comes the cutting and drain station, where you will treat the curds much like you would when you slowly pour curdled milk into cheese cloth over a bowl.
Finally, place your Cheese Making Press (Custom Sizes) and Commercial Mechanical Gravity Cheese Press so moulds can be filled and shifted forward into pressing without crossing back over raw milk or whey. This keeps your flow simple tank, vat, cut, fill, press, then into sealed containers or on racks ready for the refrigerator. When each move is only a few steps, operators can stir, drain, and load presses calmly instead of feeling like they must hurry to beat the clock.
Reducing Manual Handling in Fresh Cheese Production
Farmers cheese and similar fresh cheese types often aim for a gentle texture, somewhere between ricotta and cottage cheese, and they can turn into a bit bland or broken mass if handled roughly. Every extra lift from pot to tub, or from tub to mould, risks damaging the curds and losing yield into the leftover whey. By placing your stations in a straight line, you reduce those extra moves and keep the curd in fewer containers before it reaches the press.
Less manual handling also means less strain on staff who might otherwise carry heavy tubs of whey and curd all day. Instead, they can use short transfers and low lifts that feel more like tipping a pot or bowl at home. Over time, this more natural flow supports both product quality and staff wellbeing, especially when you are making batches less than an hour apart during busy periods.
Standardising Curd Cutting Times
Standardising cutting times is like deciding exactly when to add vinegar or lemon juice to a home batch so your curds set the same way every time. In the vat, you choose your target set point often checked by a clean break then aim to cut at that same point each day, rather than guessing. This helps you keep control of texture, whether you want a crumbly cheese for crumbling over potatoes and salads or a slightly creamier texture for spreading on bread.
Because farmers cheese usually goes from set to drain quite quickly, small changes in timing can shift moisture and flavor. Recording your standard time along with vat temperature and pH lets you gently adjust for seasonal changes in cow’s milk. Over time, this gives you a trusted pattern that turns each batch into a repeatable cheese recipe, rather than a new experiment.
Using The Cheese Harp for Consistent Curd Size
The Cheese Harp takes the place of a home wooden spoon or knife, giving you much more control over curd size and shape. Instead of rough chunks, the harp cuts even cubes or columns so whey can drain at a predictable rate and your fresh cheese finishes with the texture you want. Because the harp is made to fit your vat, you can move it smoothly through the milk without leaving pockets of larger curd behind.
For farmers cheese, a medium curd size often works well, giving you curds that are soft enough to press into smooth shapes but still hold together when you eat them or crumble them as a great ingredient in salads, bread making, or potatoes. With a consistent cut, you can decide whether this batch will lean toward a drier, more crumbly cheese or a softer style suited to spreading or layering in lasagna. Staff can be trained to follow a set number of passes so that every batch looks and feels the same in the vat.

Coordinating Cutting, Filling, and Pressing
To keep your line flowing, cutting, filling, and pressing must move at a steady pace, much like following a home cheese recipe where you stir, wait, then drain in order. Once you cut with the Cheese Harp, plan how long you will stir, how long you will wait, and when you will drain into moulds so the curd is firm enough to hold its shape. Your cutting table and draining area should sit between vat and presses, acting like a scaled up cheese cloth and bowl station.
Make sure your presses can hold all the moulds you fill from one batch so the last mould goes under pressure while the curd is still fresh and warm. This prevents a line of moulds sitting idle, slowly turning more acidic and losing the mild, sweet notes that make farmers cheese and ricotta cheese so appealing. When this rhythm is right, operators can cook, cut, fill, and press without rushing or leaving curd standing too long in open air.
Benefits of The Cheese Making Press (Custom Sizes)
The Cheese Making Press (Custom Sizes) lets you match the press to your moulds the way you might choose the right pot or bowl at home for a particular cheese recipe. Because you can size the press to your mould shapes and numbers, you get even pressure across each cheese and a consistent profile across the whole batch. That helps you hit the same texture every time, whether you are aiming for a firm, sliceable block or a softer style that will be packed into an airtight container.
In a farmers cheese line, custom presses mean you can design racks and frames that accept the exact number of moulds your vat fills. You avoid stacking moulds in odd ways that lead to uneven pressing or awkward handling. This also helps when you want to use the same line for other fresh cheese types like ricotta or cottage cheese, which might use different moulds but follow a similar pressing path.
Advantages of the Commercial Mechanical Gravity Cheese Press
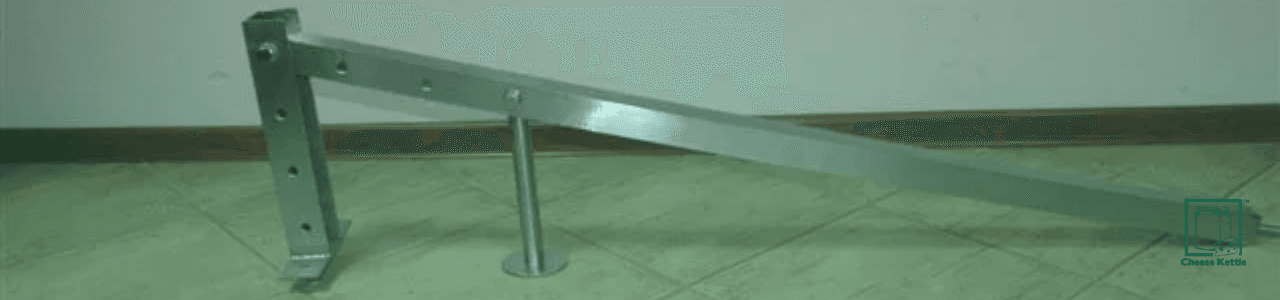
The Commercial Mechanical Gravity Cheese Press builds on the same idea but adds the power of gravity and mechanical leverage so you can press more cheeses at once. Instead of tightening individual screws, you set weights or arms and let gravity apply steady force, much like letting a heavy plate press curds in a bowl on the bench. For a busy farmers cheese line, this means more cheeses can be pressed in parallel while staff focus on cutting and filling.
Because pressure is distributed evenly, you can tune the settings to achieve a silky texture in one product or a firmer, more crumbly cheese in another by adjusting time and force. This press also supports staged pressing a lighter first press to set shape, followed by a stronger press to reach the final moisture level. That flexibility is especially helpful when you want your farmers cheese to be a great ingredient in cooked dishes like lasagna as well as something people can eat fresh with bread or on potatoes.
Pressing options in your farmers cheese line:
Feature | Custom Press | Mechanical Gravity Press |
|---|---|---|
Fit to moulds | Tailored to your exact shapes | Works with modular racks and trays |
Number of cheeses per cycle | Depends on design | High, ideal for larger batches |
Pressure control | Per frame or rack | Centralised gravity or mechanical settings |
Best use | Flexible, craft focused lines | Higher volume, time sensitive production |
Conclusion
A flexible farmers cheese workstation starts with a single line that feels as natural as making a batch of homemade farmer’s cheese in one pot, with each step following the next. By aligning your 400 Ltr Stainless Steel Milk Tank, Vat, Cheese Harp, Cheese Making Press (Custom Sizes), and Commercial Mechanical Gravity Cheese Press in sequence, you support a steady flow from milk to pressed cheese, with fewer delays and fewer chances for quality to slip. The same thoughtful layout works for farmers cheese, cottage cheese, ricotta, and other fresh cheese styles that rely on gentle handling and good timing.
From here, your next step is to sketch your room, mark where milk comes in and where cheese goes to cold storage and draw a straight line between them. Then adjust equipment so that you can heat, cut, drain, and press with the same calm rhythm you would use when you stir, slowly pour, wait, and squeeze curds in a home kitchen. Once your line is in place, you can refine small details pressing times, salt levels, and how you use leftover whey in bread or yogurt to build a farmers cheese operation that is efficient, reliable, and genuinely delicious.