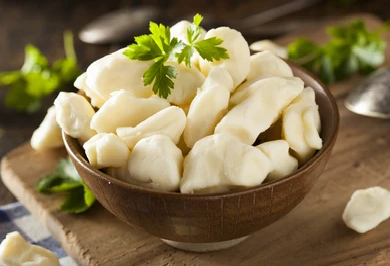
Making cheese curds is a good way for beginners in cheese making to experiment with homemade hard cheese. Cheese curds make delicious snacks. Here’s a recipe for making your own cheese curds at home.
Aging Time: none
Yield: approximately 800g of cheese curds
Ingredients
1. 4 liters milk (preferably non homogenized)
2. ⅛ teaspoon Bioprox M265 mesophilic culture
3. ½ teaspoon liquid rennet diluted in 2 tablespoon filtered water
4. 1 tablespoon cheese salt
5. ¼ teaspoon Calcium Chloride mixed with 2 tablespoon filtered water (use only with homogenized milk)
Equipment
1. Large pot
2. Thermometer
3. Curd knife/ curd cutter
4. Slotted ladle
5. Colander
6. Cheese cloth or butter muslin
7. Cutting board
Instructions
Reminder: Sterilize all your equipment before cheese making.
1. Heat the milk to 31 C (88 F) in low heat or through a water bath method in 36.6 C (98 F).
2. Once you’ve reached the target temperature, remove the milk from the heat. Sprinkle the mesophilic culture on the surface of the milk. Allow to rehydrate for 5 minutes.
3. Stir the milk gently in steady up and down motions.
4. Cover the pot and allow the milk to ripen for 45 minutes. Make sure to keep the temperature at 31C (88F) during this process.
5. Add the rennet. Stir well in an up and down motion.
6. Allow the milk to set for another 40 minutes. Continue to keep the temperature at 30 C to 31 C (86 F to 88 F).
7. Check for a clean break, then cut the curds into ½ inch cubes using your curd knife or curd cutter.
8. Place the pot on low heat and heat the curds to 38.9 C (102 F) for the next 30 minutes. Stir frequently. You will notice the curds shrink to about the size of a peanut.
9. Once you’ve reached the target temperature, cover the curds. Maintain the temperature for another 30 minutes. Stir gently every 5 minutes to prevent the matting of curds. After this process, the curds should lump together when you squeeze a handful of them by hand, and when you press the lump with your thumb, the curds should separate easily.
10. Cover the pot and let the curds settle at the bottom of the pot.
11. Line the colander with cheese cloth or butter muslin. Put a large clean bucket or bowl under the colander to catch and save the whey. Pour the curds into the colander and allow to drain for 10 minutes.
12. Pour the whey back into the pot. Bring the temperature back to 38.9 C (102 F).
13. Remove the cheese cloth from under the curds. Place the colander of curds over the pot. Cover. Keep the temperature at 38.9 C (102 F) for 10 minutes. The steam from the whey should cause the curds to melt into a slab.
14. Lower the temperature to 36.7 C. Keep heating the curd slab at this temperature for an hour, flipping it every 15 minutes. The curd slab should look white and a bit shiny at the end of this process.
15. Transfer the slab to a clean cutting board. Cut the curd slab into small strips like french fries.
16. Transfer the curd strips into a bowl and add salt. Make sure all the strips are thoroughly coated.
17. Put the curd back in the colander. Place the colander on a large bowl. Let the curds sit in the colander uncovered to dry for 24 hours.
18. You can serve the cheese curds immediately or store them in the refrigerator. They should last for about 2 weeks.
Cheese Curds Variations
1. Southwestern Spicy Cheese Curds
After letting the cheese curds dry, you can add pepper flakes or dried chilies to give your cheese curds a kick of spice.
2. How to Make Squeaky Cheese Curds
Squeaky Cheese Curds are a fresh variation of cheddar cheese. The process includes all the same steps as cheddar but the curds are not fully pressed and aged, hence it separates easily into slices or chunks.
Here’s how you can make squeaky cheese curds using the same ingredients mentioned above.
1. Heat the milk to 32 C (90 F).
2. Sprinkle the mesophilic culture to the surface of the milk. Allow to rehydrate for 5 minutes.
3. Stir the culture gently in an up and down stroke.
4. Cover the pot and let the milk set for 90 minutes while maintaining the target temperature.
5. Add the calcium chloride (if using homogenized milk) and rennet. Stir well.
6. Let the milk rest for 45 minutes. Continue to keep the temperature at 32 C (90 F).
7. Check for a clean break.
8. Cut the curds into ½ inch cubes using a curd knife or curd cutter.
9.Slowly increase the temperature to 43 C (110 F) for the next 30 minutes. Stir the curds gently every 5 minutes.
10. Once the target temperature is reached, continue to cook the curds for the another 30 minutes.
11. Line a colander with cheese cloth or butter muslin. Pour the curds into the colander to drain.
12. Pull up the sides of the cheese cloth, tie and hand the curds to drain for 30 minutes.
13. Twist the cheese cloth tight to remove any excess whey.
14. Press the cheese with 3.5 kg (8 lbs) of weight for 2 to 3 hours.
15. The curds should knit into one solid mass.
16. Break the curds with your fingers or cut them with a knife.
17. Sprinkle salt and mix well.
18. The curds will be squeaky for the first few hours. You can serve it right away, use as an ingredient for poutine or store them in the refrigerator.
19. Consume the cheese within 4 weeks.
You may also like these Cheese Recipes


Essential Cheese Making Equipment for Large Scale Cheese Production
Are you producing large quantities of cheese for your business? Here are five necessary cheese making equipment to make your cheese production faster and better.
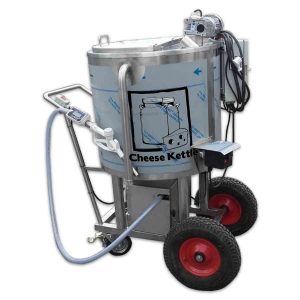
Cheese Making Kettle Vat
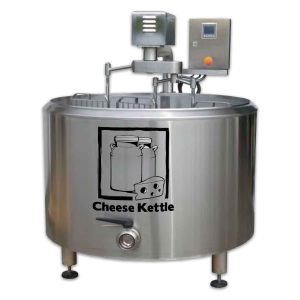
Cheese Kettle’s Vat it’s perfect for small artisan cheese factories or dairy processors. Comes in various sizes from 100 L up to 1,500 L square or round.
Milk Pasteurizer
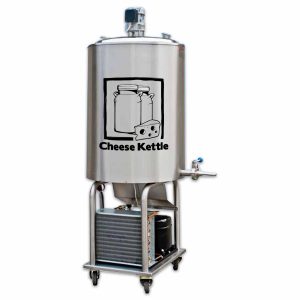
A milk pasteurizer with a chiller and heating with electrical heaters up to 100°C and as well as air cooled heat exchanger for cooling down to 4°C with cooling aggregate.
Separate heating / cooling unit.
Brine Tank
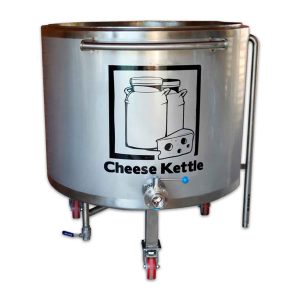
500 Ltr Brine Making Tank for sale – pasteurization to 90deg C
Tank is fitted with
• 3 x 9KW heating elements (total 27KW)
• made of 304 or 316 (marine grade stainless)
• circulation pump
• large 3″ butterfly valve
• set of food grade wheels
• double or single lid
• may be fitted with agitator if required
Calf Milk Taxi
This Calf feeding milk taxi is the Rolls Royce of manual calf feeding, which is fast catching on in Australia. With a rechargeable battery-powered pump and dosing tap, the stainless steel container holds 80 to 260 litres, and it is mobile. It will warm, agitate, and hold milk at temperature. It shines mixing milk powder, and it dispenses perfectly measured amounts time and time again.
The Calf milk taxi for sale also comes in a pasteurised model. Consistency is part of the secret to successful calf-rearing and the Milk Taxi excels at consistency.
Commercial Mechanical Cheese Press
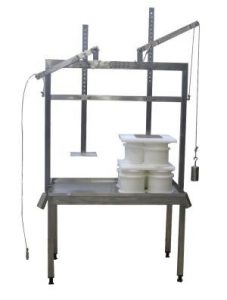 The mechanical cheese press is a less expensive alternative for the pneumatic cheese press.
All Stainless Steel Construction to meet Australian standard.
Cheese bags can be hung on the upper support arm.
Modular design so you purchase only what you need. Start with a basic work table, add an extra draining shelf, cheese molds and lever press arms as needed.
The pressure can be adjusted by stainless steel weights through a system of level arms and cords.
At Cheese Kettle, we provide you with high quality brand new and second hand cheese making equipment, from cheese vats and brine tanks to milk taxis and churners. We can also customize the cheese making equipment you get from us to fit your needs. Speak with one of our specialists today. Call or email us.