Before the rise of machines, cheesemaking was an art. Traditional cheesemakers make cheese by hand on the farm using old techniques that have been passed down through many generations. Compared to this day where we have tools to measure pH levels, ancient cheese makers rely only on their senses of sight, smell, and touch.
Different cheeses have a variety of recipes. However, be it traditional or modern, the basics of cheesemaking remain the same. Here are the important steps in cheesemaking.
1. Standardize milk
Standardization is the practice of altering the composition of the cheese milk to meet regulatory standards. With this, the cheese quality and composition specifications are maintained such as optimizing protein to fat ratio, limiting moisture, maximizing cheese yield, and increasing efficiency.
Because cows, sheep, and goats produce milk with varying amounts of protein and fat, standardizing the milk will help ensure that cheese milk is up to the right composition.
2. Acidification
Acidification is the first step in making cheese. During this stage, the pH level of the milk is lowered and the acid content is increased. The process is usually performed by bacteria. A starter culture is added to the milk where the bacteria feed on the lactose and produce lactic acid. This acid is vital in making good cheese. However, too much lactic acid can make the cheese crumbly while not having enough acid will make the cheese pasty.
3. Coagulation
This process turns the liquid milk into cheese. To convert the liquid into a solid mass, a common enzyme called “rennet” is added either as a liquid or paste. This allows the milk to solidify by causing the proteins in the milk to link together.
4. Curd and Whey
When the enzyme is added to the milk, the milk forms curd and whey. The solid lumps are called “curds” and the liquid byproduct is called “whey”. The next step is to cut the curd. This is usually done with a cheese harp or with a knife. Cutting the curds expels whey. The size of the curd to which you cut it determines the moisture content of the final cheese. The smaller the pieces, the drier and harder the cheese will be.
5. Salting
Once cutting is done and the curds are separated from the whey, salt is added for flavour. The primary purpose of salting cheese is to preserve the cheese and help it ages for long months and years. Salt stops the bacteria culture to continue converting lactose into lactic acid.
A salting technique called brining is utilized in cheese varieties such as Gruyere, wheel Swiss, wheel Gouda, wheel Parmesan, and mozzarella. Another salting method involves rubbing salt to the outside of the wheel of cheese or with a damp cloth soaked in brine.
Salt is a huge and significant factor that affects the overall quality of cheese. Too much salt can cause moisture issues and salty flavour. Too little salt and the cheese will have shorter shelf-life, too much acid, and flat flavour.
6. Shaping
The size of the moulds and hoops depends on what type of cheese you want to make. The cheese is placed in a mould to form it to a specific shape. The cheese is then pressed with a machine or weights to expel any remaining liquids.
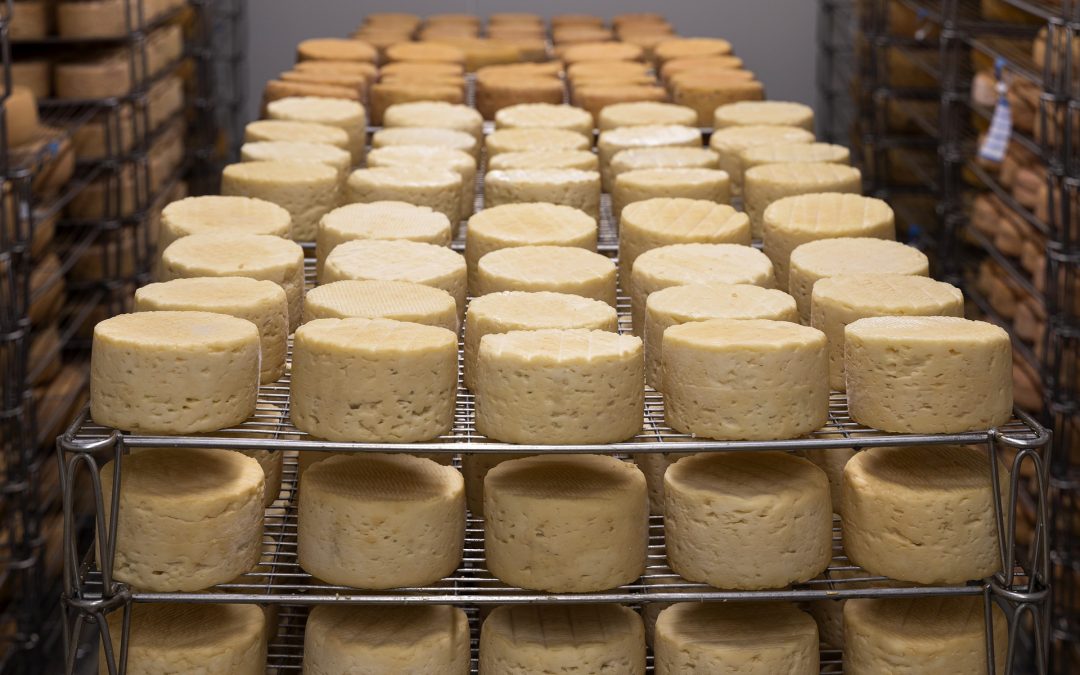
7. Ripening and Aging
After the cheese is shaped, it will need time to air dry. The amount of time you want to store the cheese depends on what type of cheese you want to make. Some can be aged for a few months while others can last for years.
In order for the cheese to reach the optimal ripeness, the cheese is stored in a cave or room under proper temperature and humidity. The cheese is covered with a muslin or cheesecloth and placed onto a wooden board or cheese mat.
During the drying process, flip the cheese throughout the day so that all surfaces will be dried evenly.